OpenOffice.org can import various vector (line drawing) and raster (bitmap) file formats. The most common are GIF, JPEG or JPG, PNG, and BMP. See Graphic file types supported for a full list of supported graphic file types.
Graphics may be downloaded from the Internet, scanned, created with a graphics program, or they may be photos taken with a digital camera. Some questions come to mind:
These questions will be discussed in order.
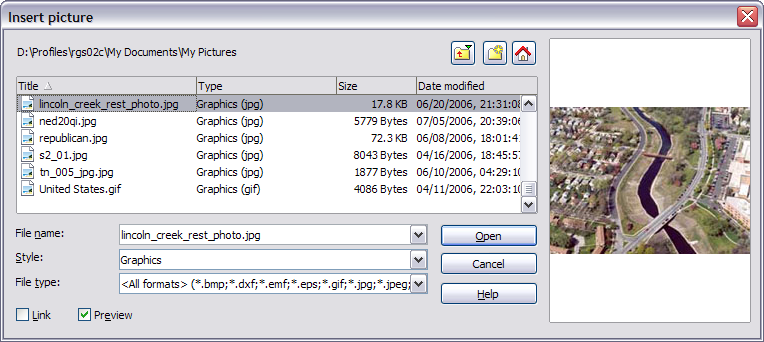
To insert a graphic image from a file, the file must be already stored in a directory (folder) on the computer.
Proceed as follows:

Insert picture dialog box
Note: At the bottom of the Insert picture dialog box are two checkboxes. If the Preview checkbox is checked, the selected graphic file is previewed in a pane, so you can verify that you have the correct file. The Link checkbox is discussed below.
If the Link checkbox in the Insert picture dialog box is checked, OOo will create a link to the file containing the graphic, instead of saving a copy of the graphic in the document. The result is that the figure will be displayed in the document, but when the document is saved, it will contain only a reference to the graphic file but not the graphic itself. The document and the image remain as two separate files, and they are merged together only when you open the document again.
Linking an image has two advantages and one disadvantage:
It is possible, and quite likely, that the inserted image will not fit perfectly into the document because it is too big or too small. Therefore, you will probably need to resize the image.
The position of the image is not relevant for now. Changing the position of an image relative to the text is discussed in Positioning graphics within the text.
You can modify the size of a graphic in two ways:
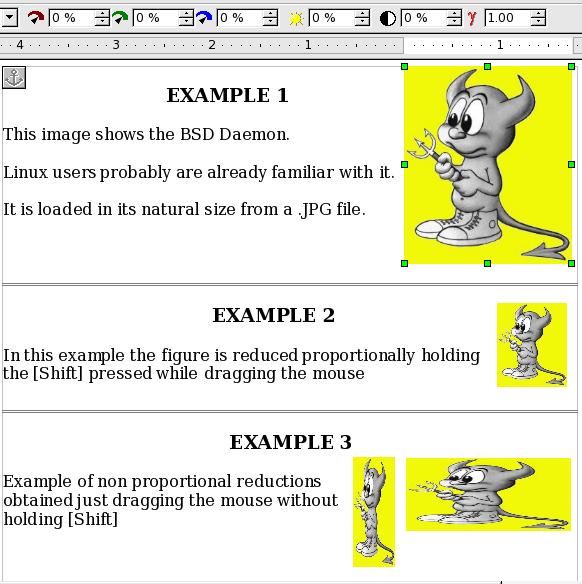
The figure below shows three examples of an image inserted into a document and resized.

Three examples of resized images, plus the original image
In Example 1, the image is in its natural size. When you add a new graphic (and also when you select an existing one by clicking on it), it displays some square points along its perimeter; these are called handles. To resize the graphic:
This basic resizing process is useful if you need to specify the size and the height independently of each other. The problem with this method, as demonstrated in Example 3, is that when the graphic is not changed to scale, it will be distorted.
You need to either carefully measure and calculate how much the image needs to be adjusted in both the horizontal and vertical directions in order to maintain the correct proportions or use the scaled resize method described below.
A scaled resize is usually the best option, because it automatically maintains the proportions of the graphic. To perform a scaled resize:
You can insert images from sources other than a file. The possible sources for images are:
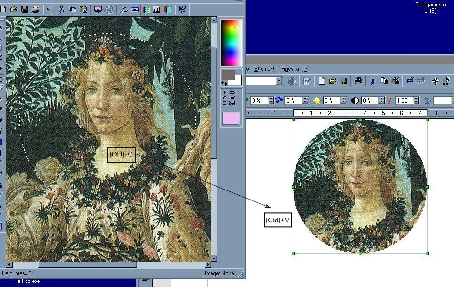
You can use many different graphics programs to edit a graphic file. In these programs, you can select, copy, and paste an image or part of a graphic into an OpenOffice.org document. The figure below shows an example of this procedure, which can be recreated with these steps:

Using a graphics program
If a scanner is connected to your computer, OpenOffice.org can call the scanning application. The scanned item will then be added into the OOo document page as an image. To start this procedure, on the main menu select Insert > Picture > Scan > Select Source.
The Gallery is available in all components of OpenOffice.org. For an introduction to the Gallery, see Chapter 14 (Working with the Gallery) in the Getting Started guide.
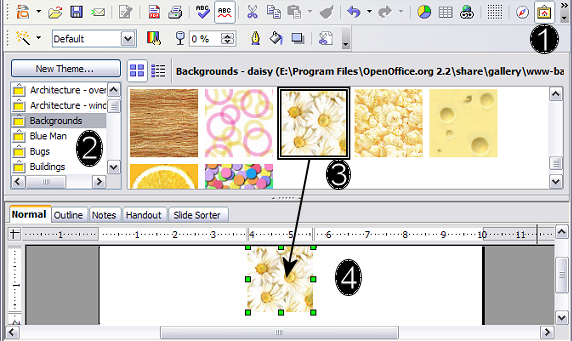
You can select a graphic from the Gallery and drag it into the document. The Gallery icon is located in the right side of the Function Bar. Proceed as follows:
The figure below shows an example of an image dragged from the Gallery.

Inserting an image from the Gallery
| Content on this page is licensed under the Creative Common Attribution 3.0 license (CC-BY). |